Publish a Federated SaaS App
Use the CSE Federated technique to enforce device-based access control policies on a SaaS application using Cloud Secure Edge's zero-trust security framework
- Last validated: Aug 3, 2026
Doc status: CSE-side steps reviewed 2026-06-29. The third-party IdP console steps follow the vendor’s own documentation and should be confirmed against the live admin console, which can change without notice.
This quick start walks through the CSE Federated technique — configuring the SaaS application’s SSO directly against CSE’s TrustProvider so that CSE can enforce per-application device policies. It is one of the two ways to implement IdP Federation; for the alternative, where federation is configured inside your Identity Provider, see IdP Routed.
Scenario
For this guide we have a public internet-facing web application - typically a multi-tenant Software-as-a-Service (SaaS) Application - that supports user authentication using OpenID Connect (OIDC).
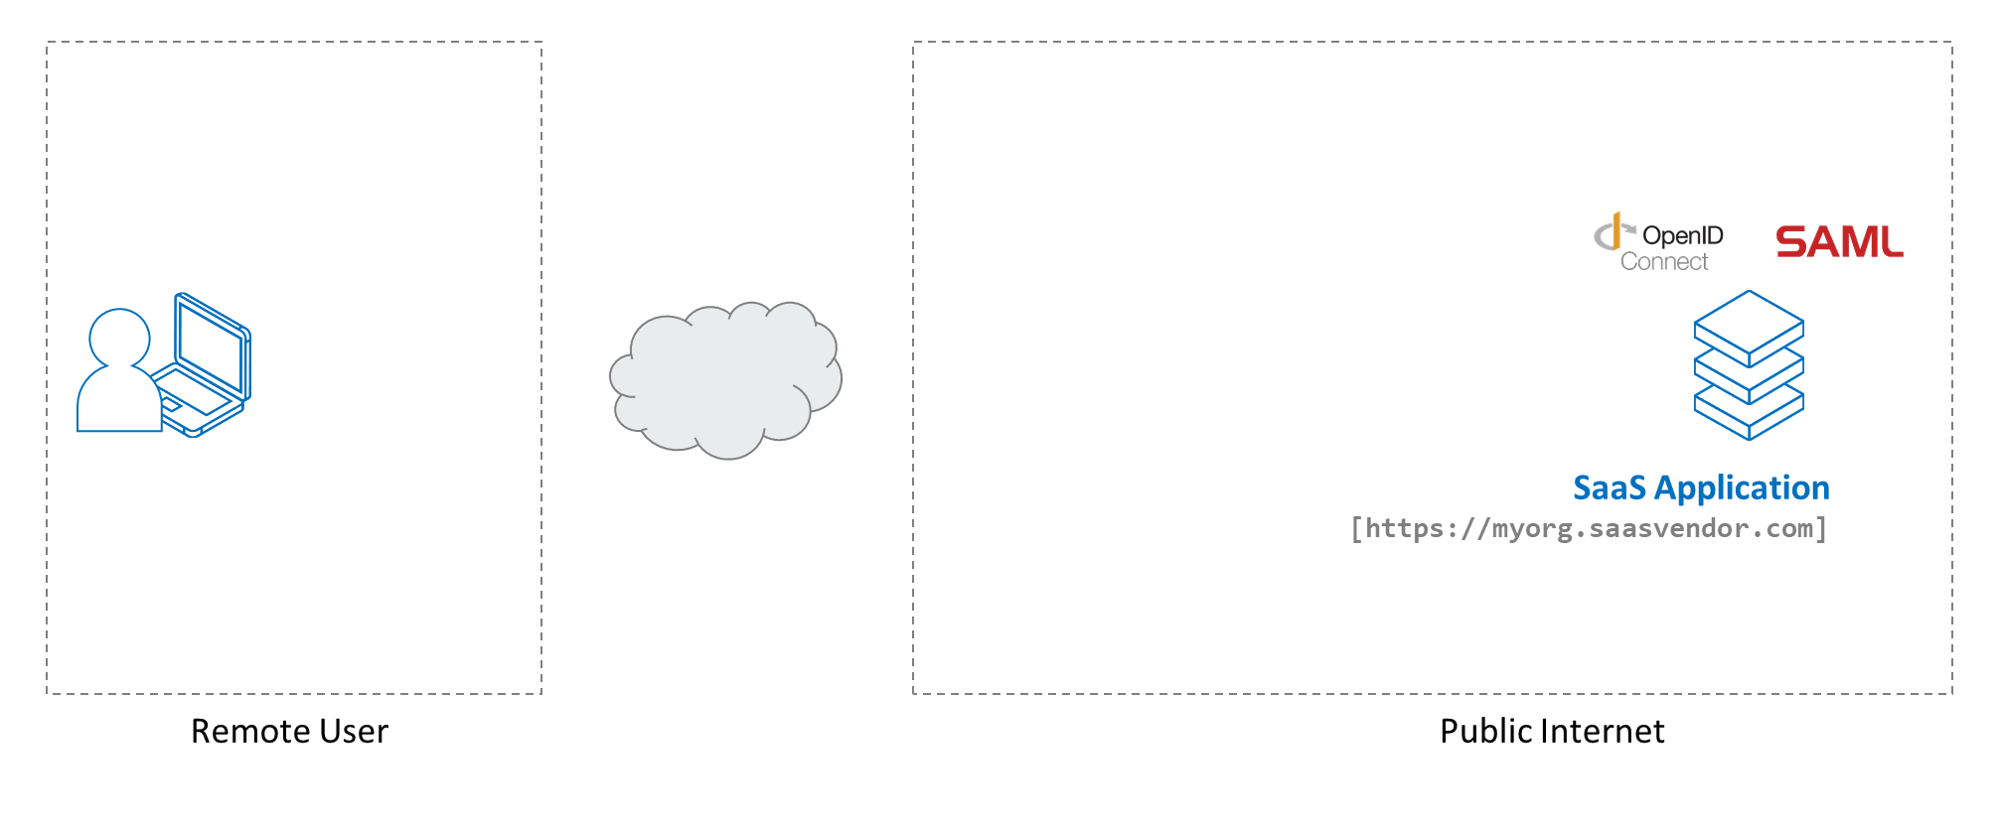
We assume your end users have been added to your Cloud Secure Edge (CSE) directory, and that they have the latest desktop or mobile app installed on devices from which they will access this application.
This guide primarily refers to OIDC-enabled SaaS applications. However, CSE also supports SAML-enabled SaaS Applications and the same steps can be extended to SAML-enabled SaaS applications.
Setup
The setup is as follows:
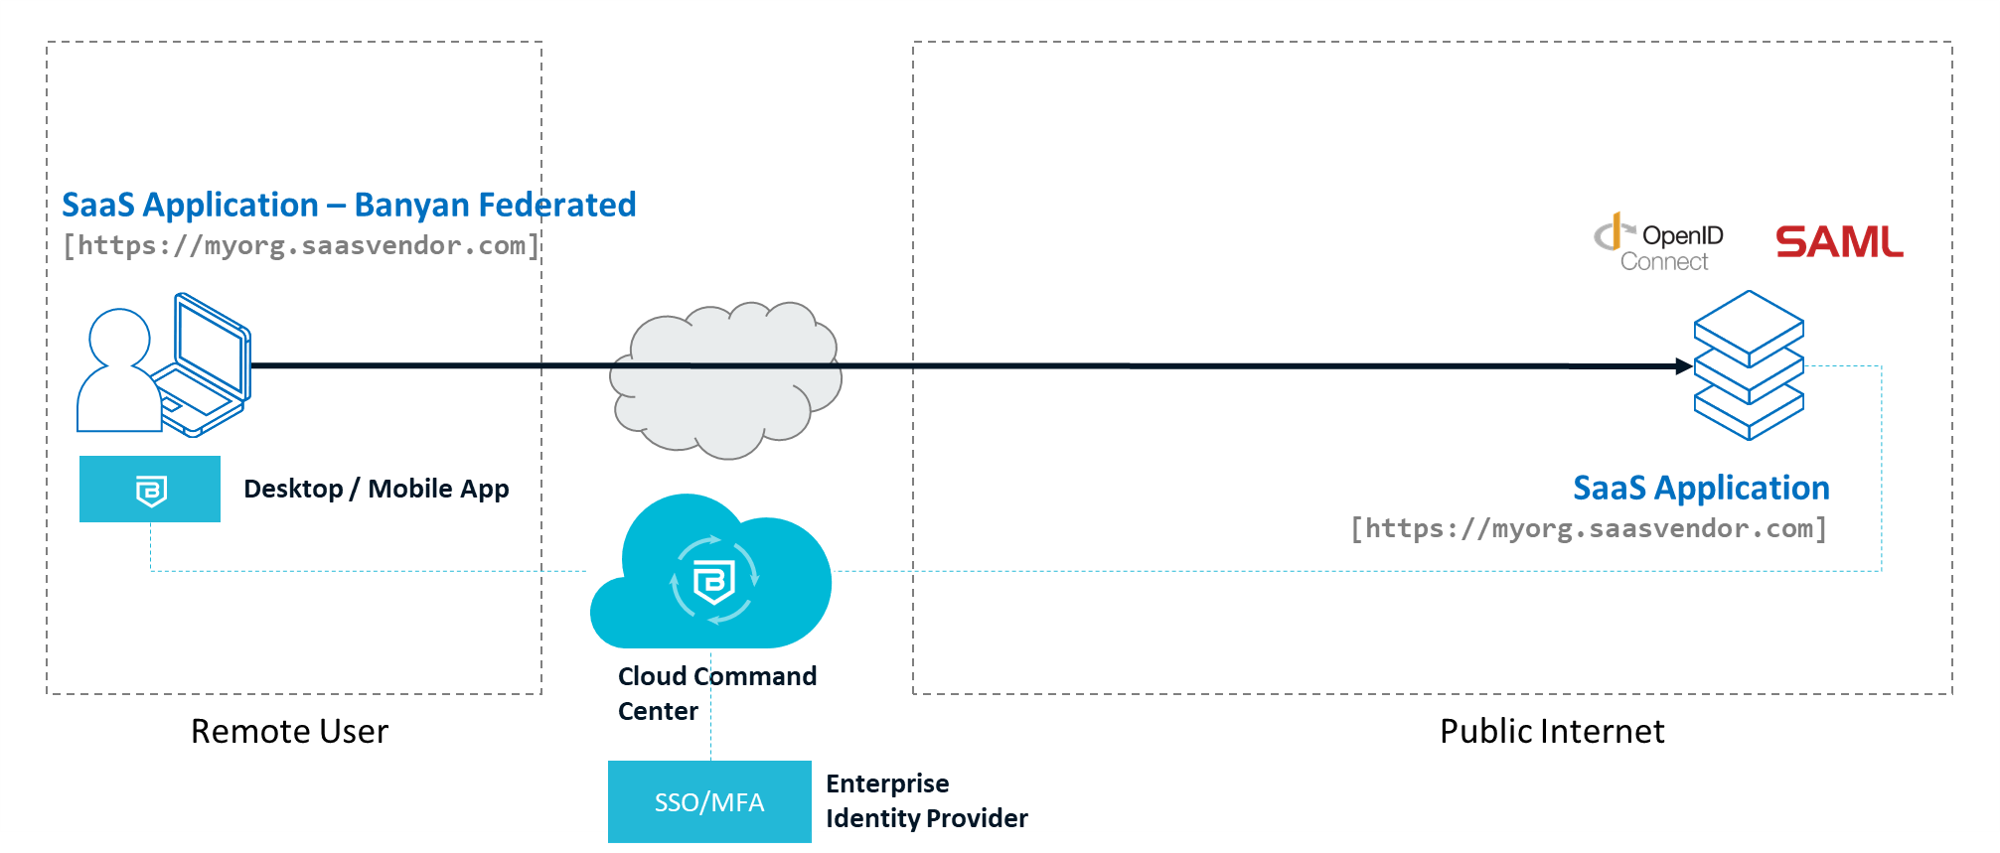
-
The SaaS Application we’ll secure supports OpenID Connect (OIDC) for authentication.
-
We have the SaaS Application’s authentication Redirect URL (aka Callback URL) and have rights to configure its OIDC settings.
Note: CSE is NOT a primary Identity Provider; instead the CSE TrustProvider component federates to your organization’s Identity Provider upon every login. CSE then evaluates security posture against access policies.
Steps
We will add a security policy to the SaaS Application in 4 steps. The goal of these steps is to insert CSE between the SaaS application and your Identity Provider so that, on every login, CSE evaluates device posture and access policies before the user reaches the application. The CSE Command Center steps below are authoritative; the SaaS application’s own OIDC/SAML configuration screens are owned by that application’s vendor, so confirm those screens against the vendor’s documentation.
Values to exchange
The federation relies on a small set of values passed between the SaaS application and CSE. Use the values exactly as presented in your environment; do not substitute example text.
| Direction | Value | Source | Destination |
|---|---|---|---|
| SaaS App → CSE | Redirect URL (Callback URL) |
The well-known Redirect URL provided by the SaaS application you are securing | Entered in CSE when publishing the SaaS App (Step 2.3) |
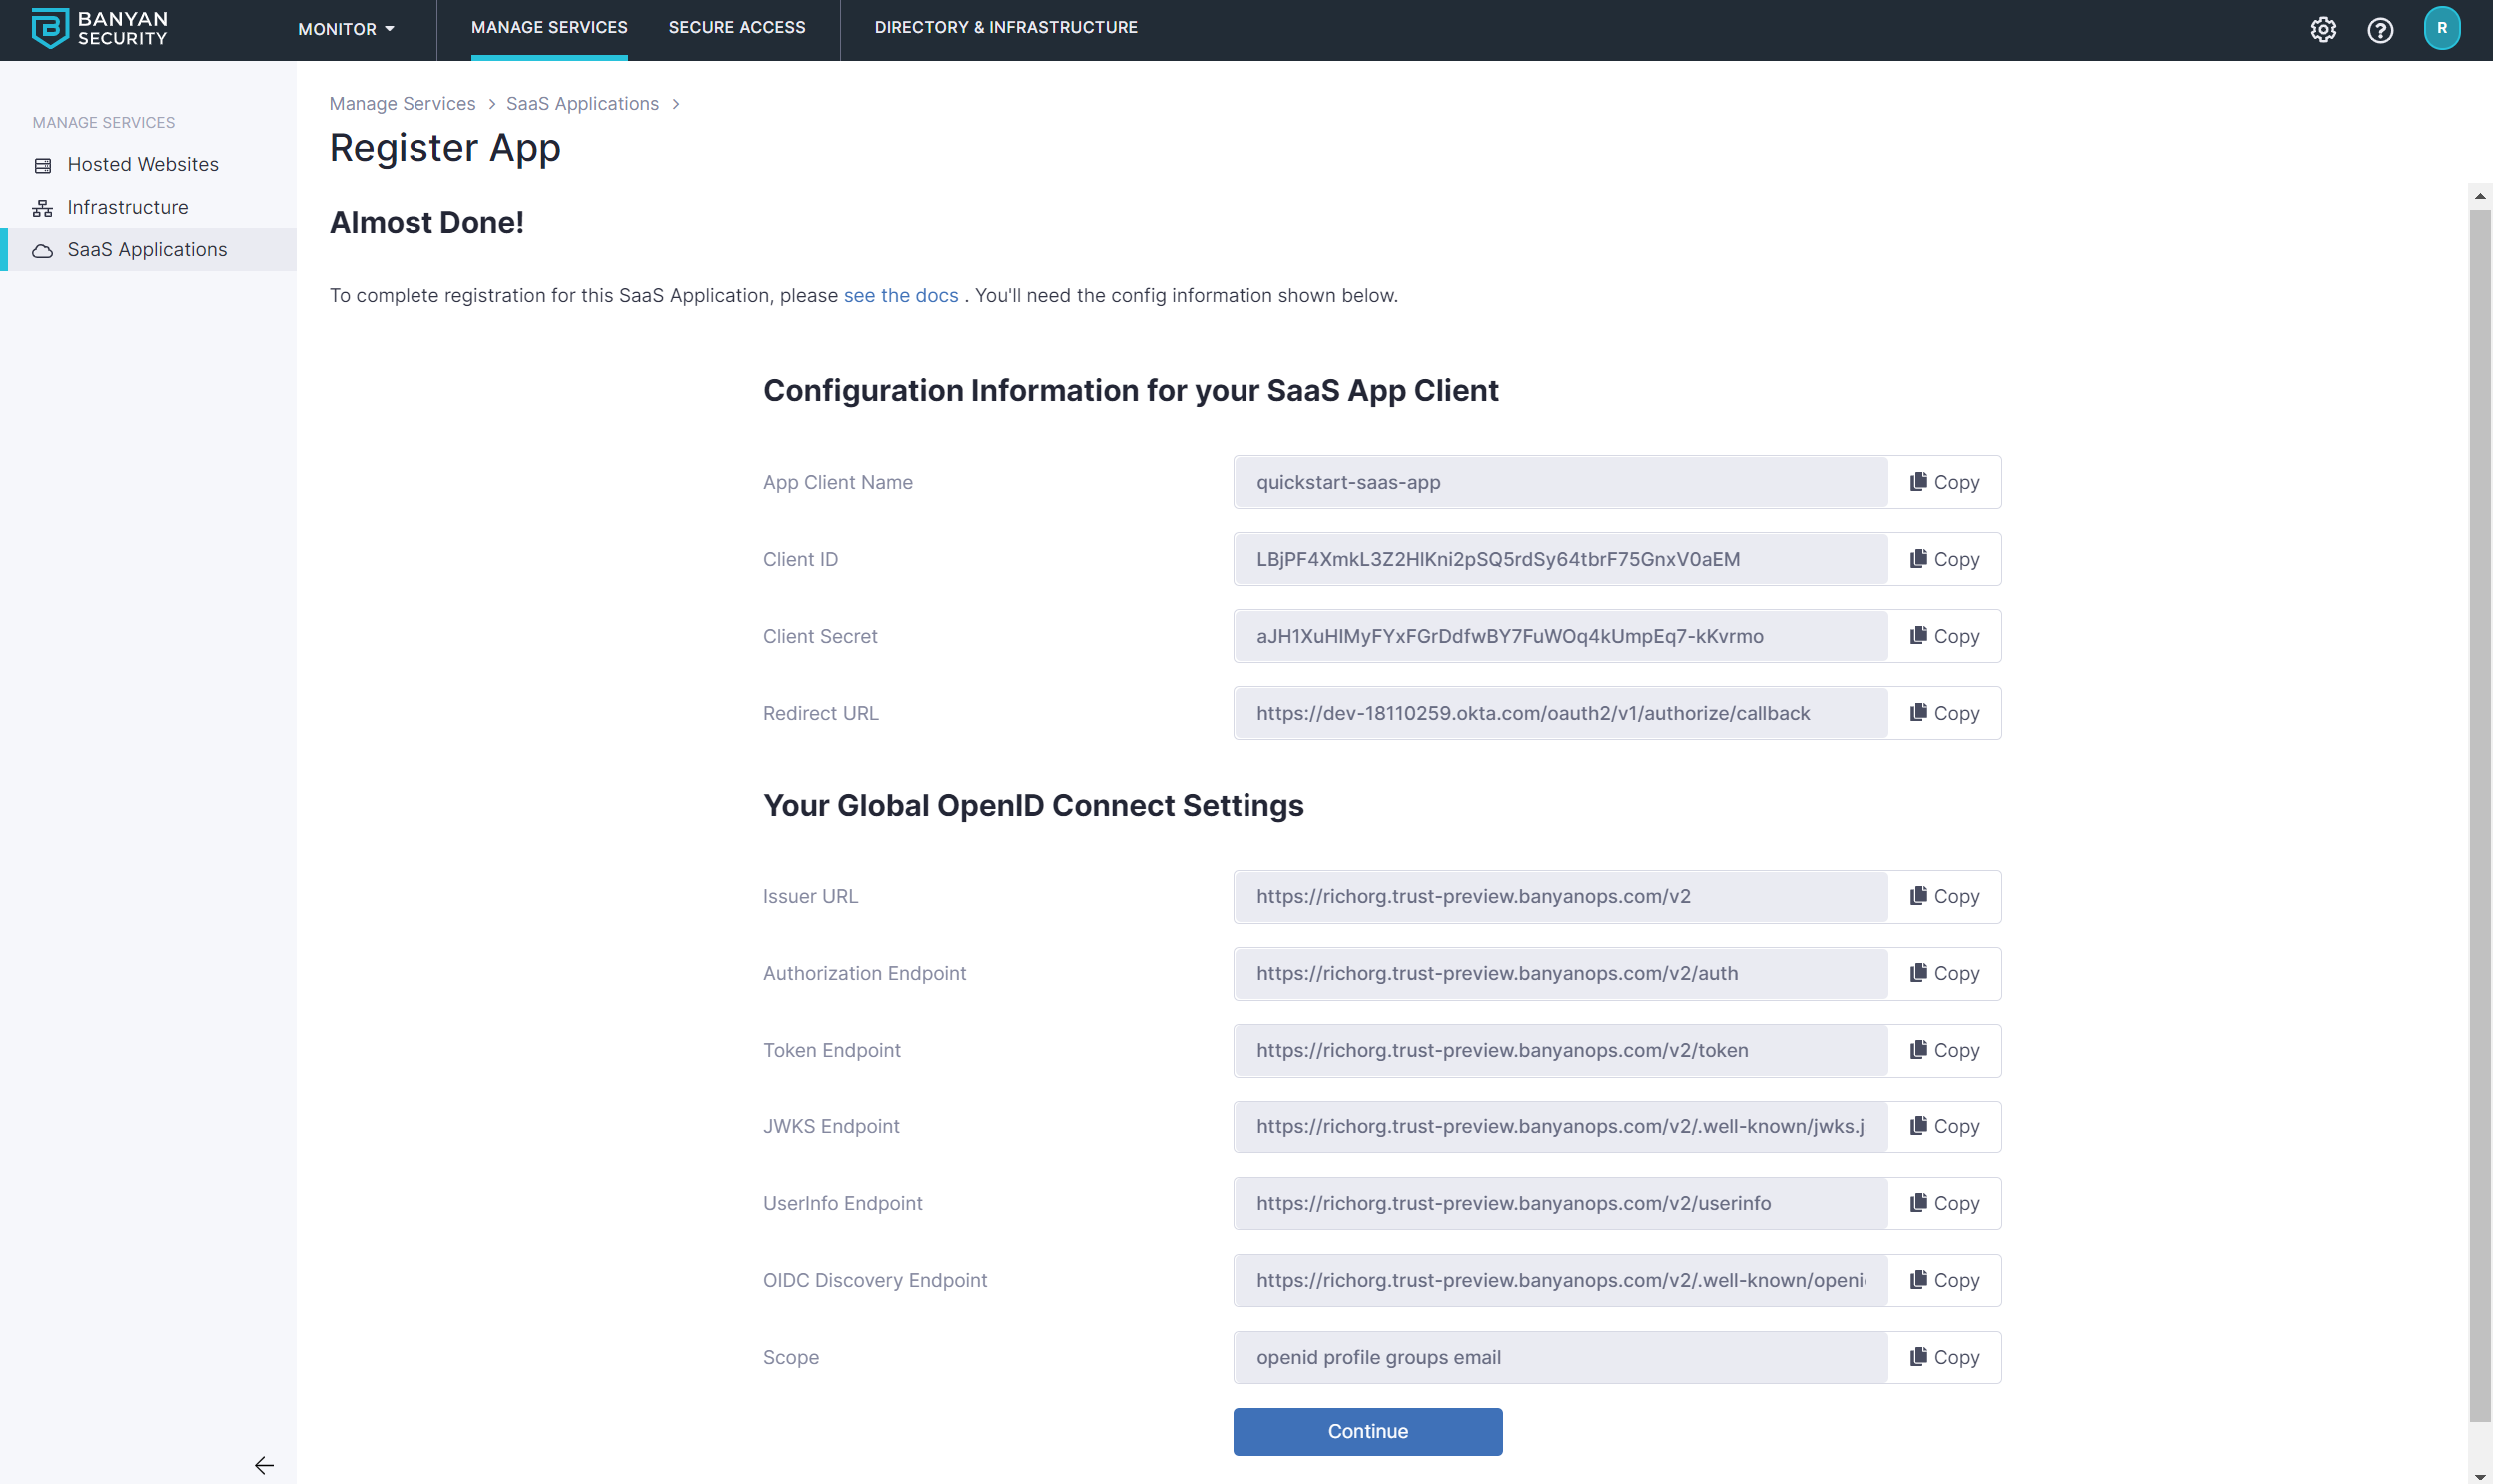
| CSE → SaaS App | OIDC connection details shown on the registration screen | CSE Command Center after Register (Step 2.5) | Entered into the SaaS application’s OIDC settings (Step 3.1) |
Step 1. Create a Policy for SaaS App Access
This step defines the access policy that CSE will enforce on each login to the SaaS application. The policy is what lets CSE evaluate role and Trust Level before granting access.
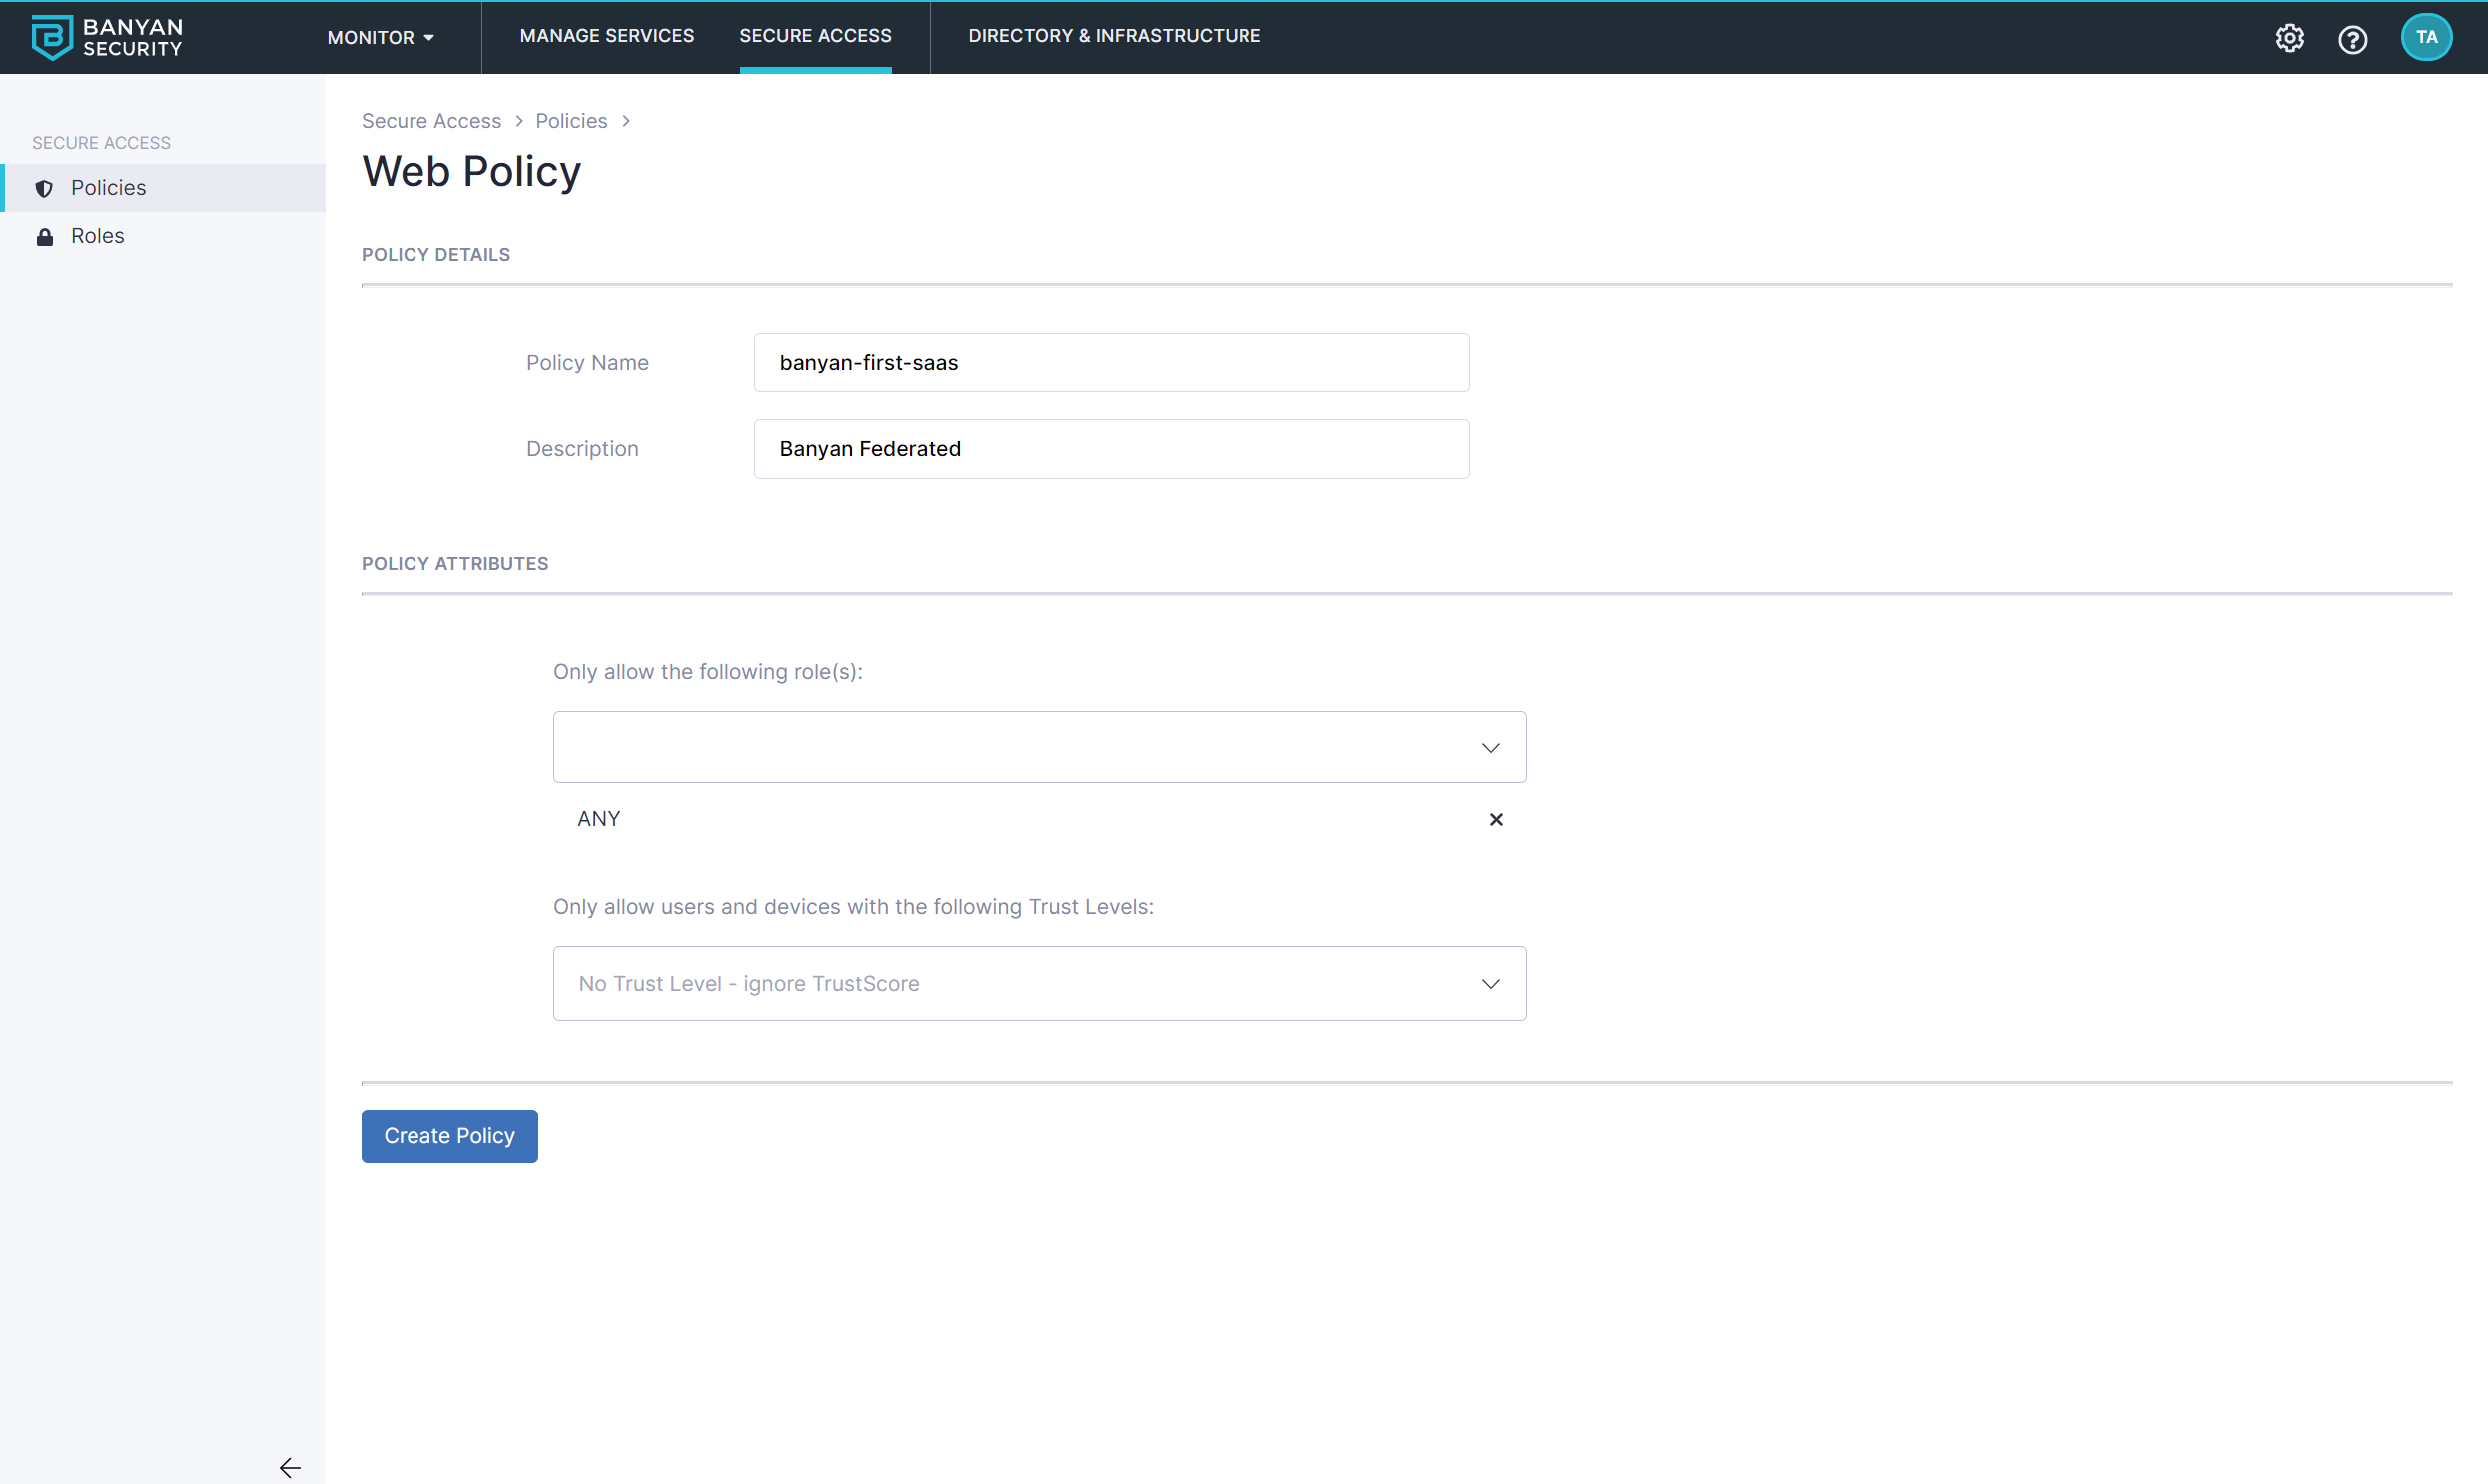
1.1 Navigate to Private Access > Access Policies, and select + Create Policy. Then select the Web Policy template. This opens the policy editor scoped to web-based applications.
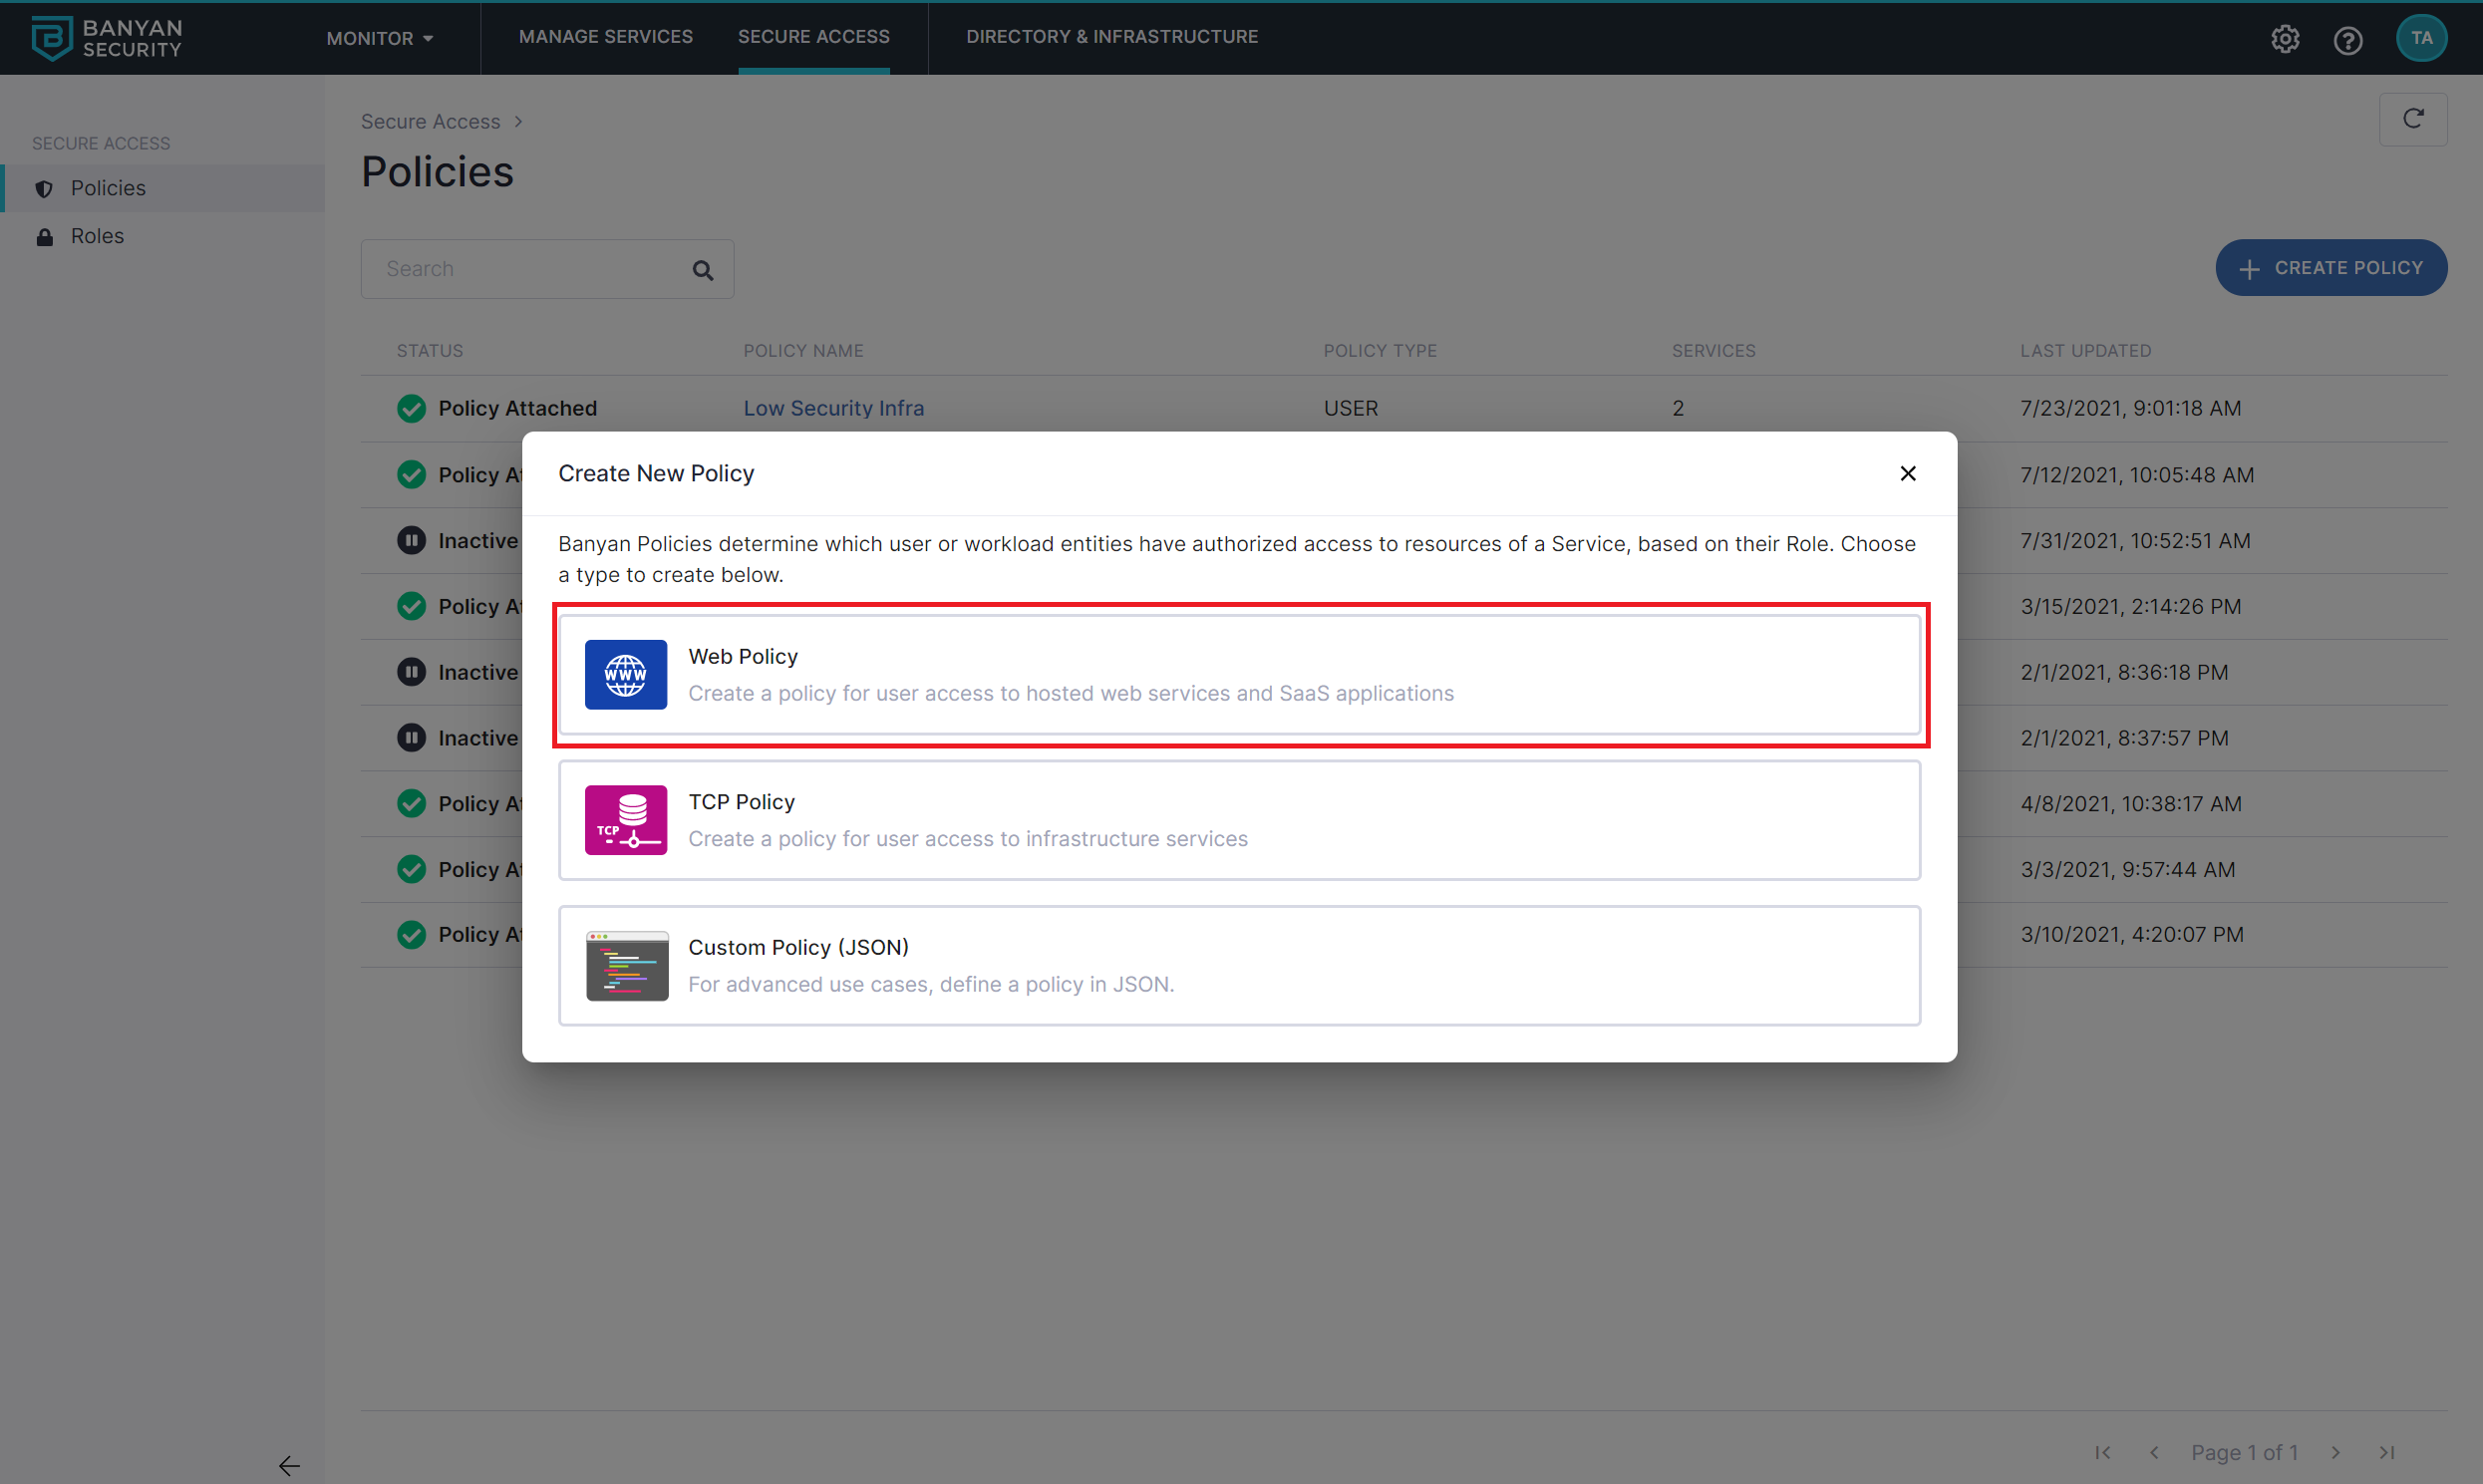
1.2 Name the policy quickstart-user-saas.
Also set the policy attributes for minimal controls:
- Only allow access from the following role: ANY
- Only allow users and devices with the following Trust Levels: No Trust Level - ignore TrustScore
Step 2. Create the SaaS Application
This step registers the SaaS application in CSE and produces the OIDC connection details you will hand to the application. It is also where you attach the policy from Step 1 so CSE enforces it on this application.
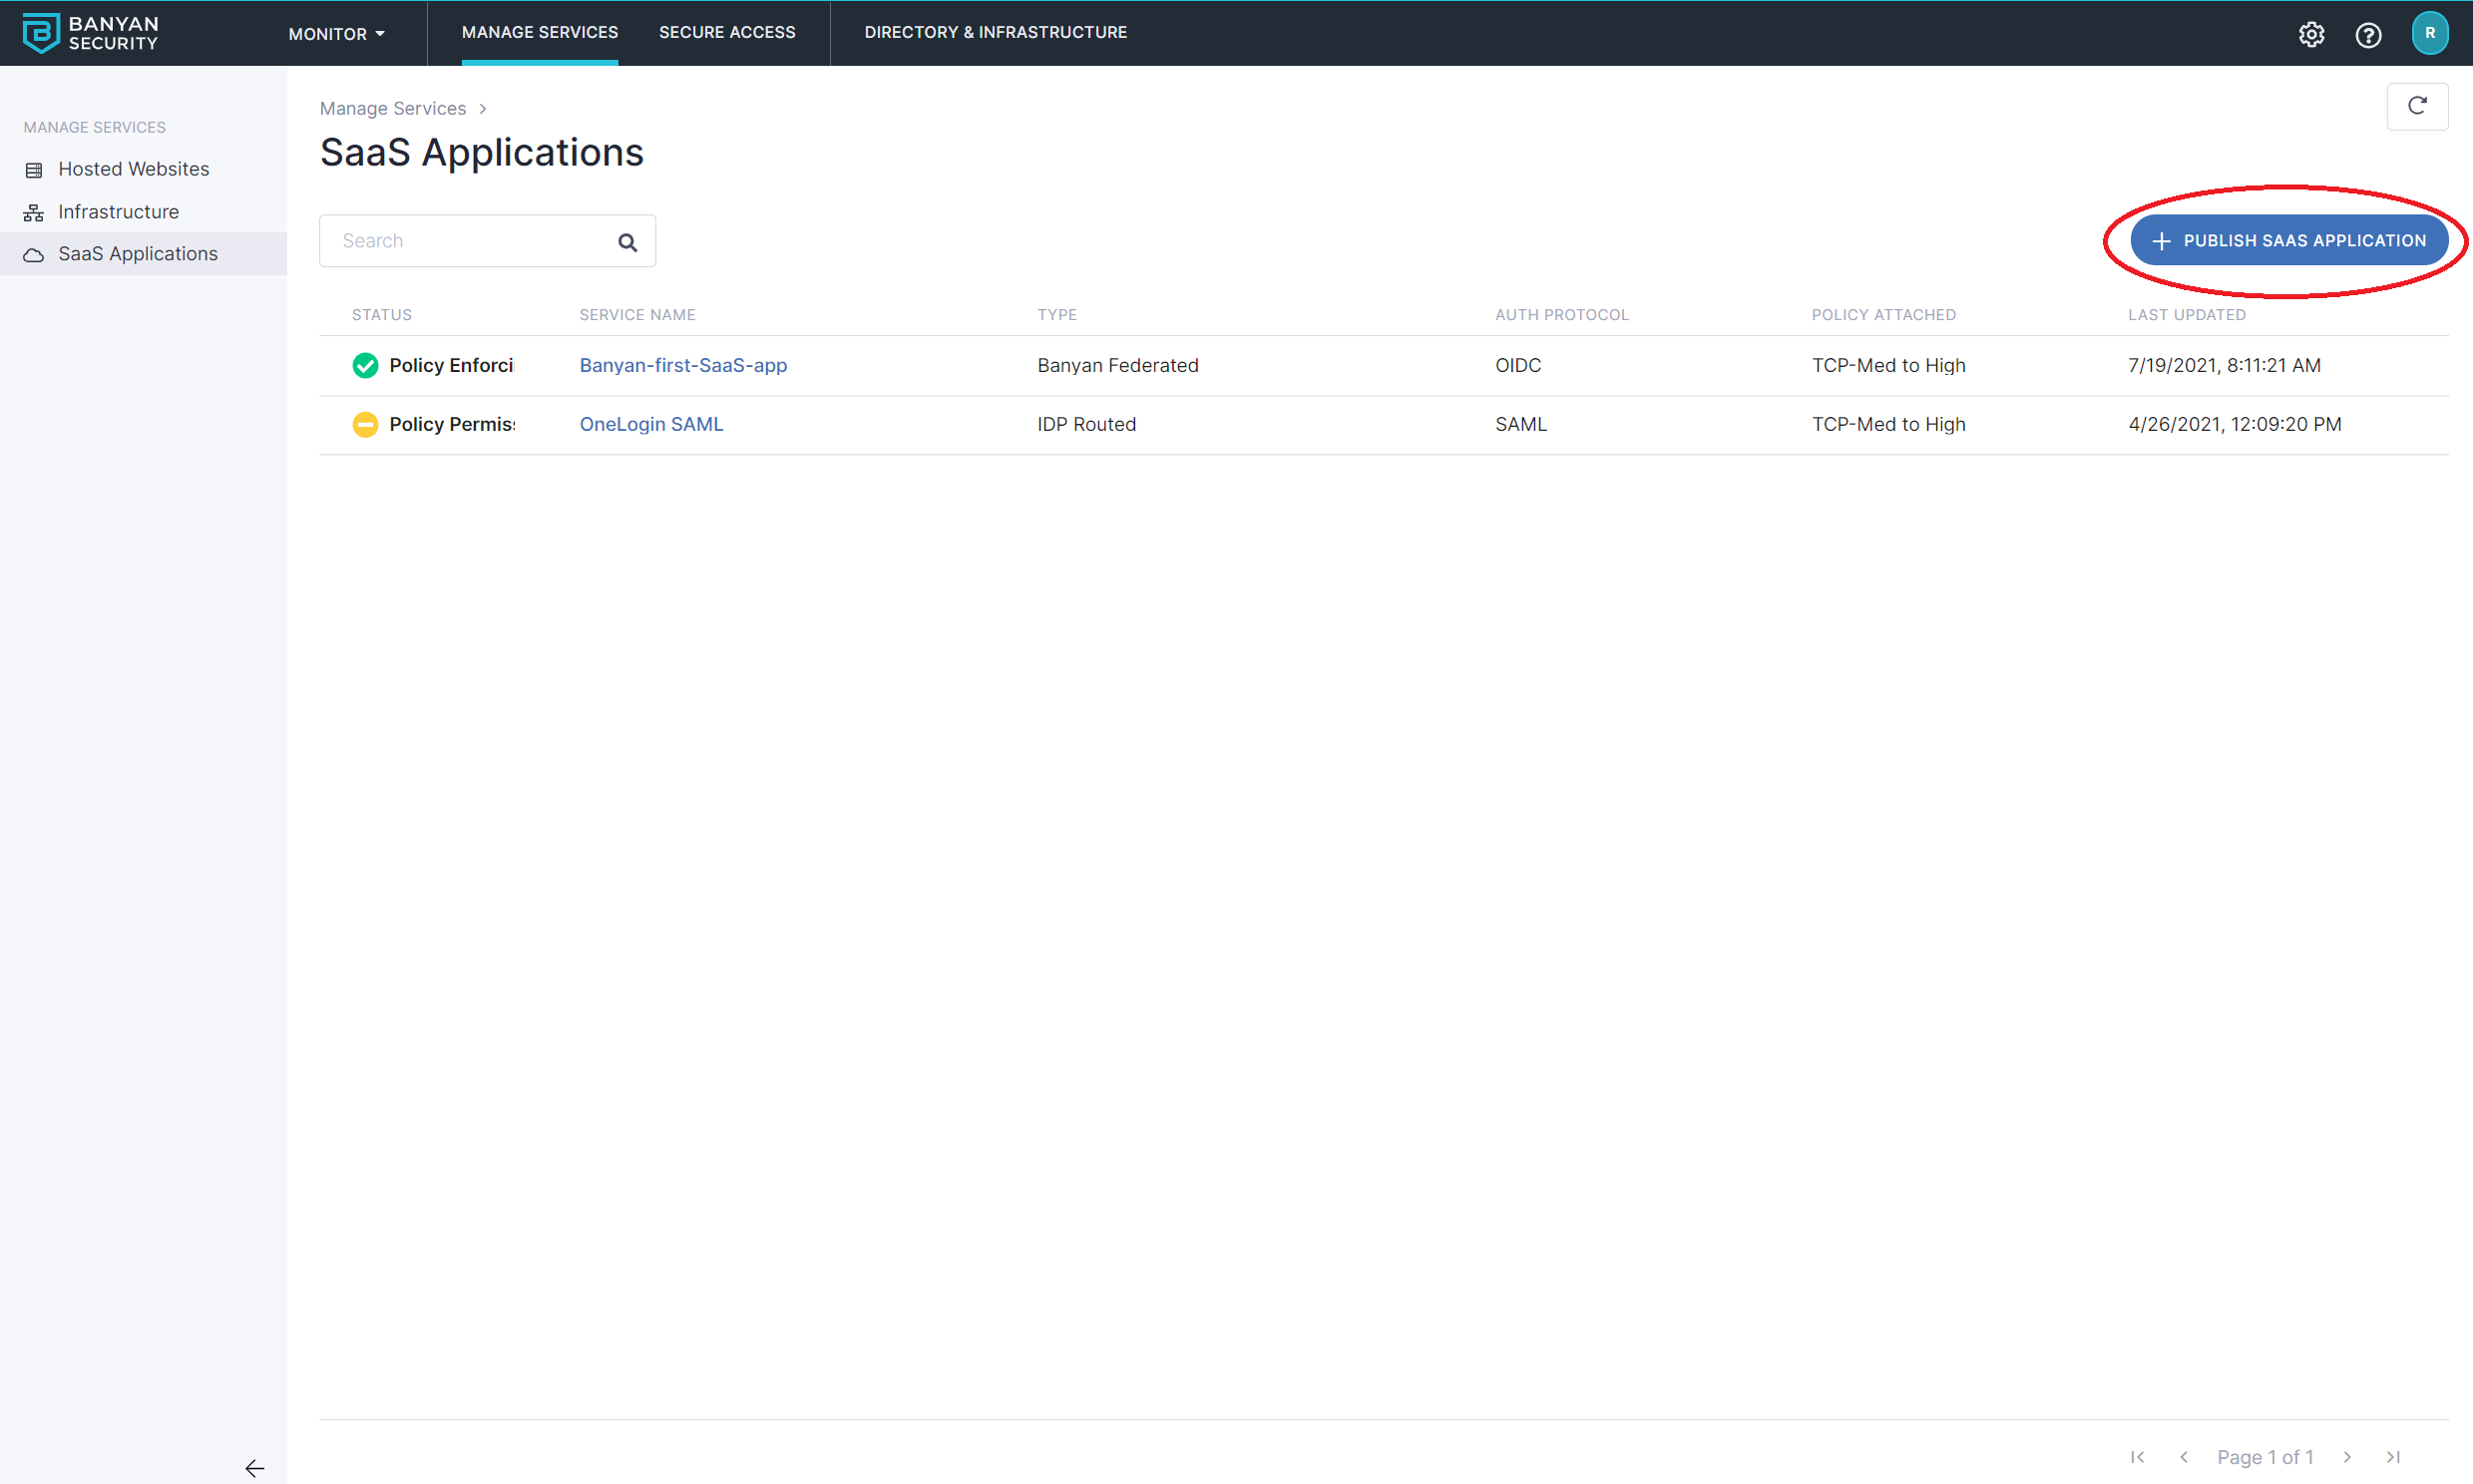
2.1 Navigate from Internet Access > SaaS Apps, and then select + Publish SaaS Application. This starts the registration workflow for a new SaaS application.
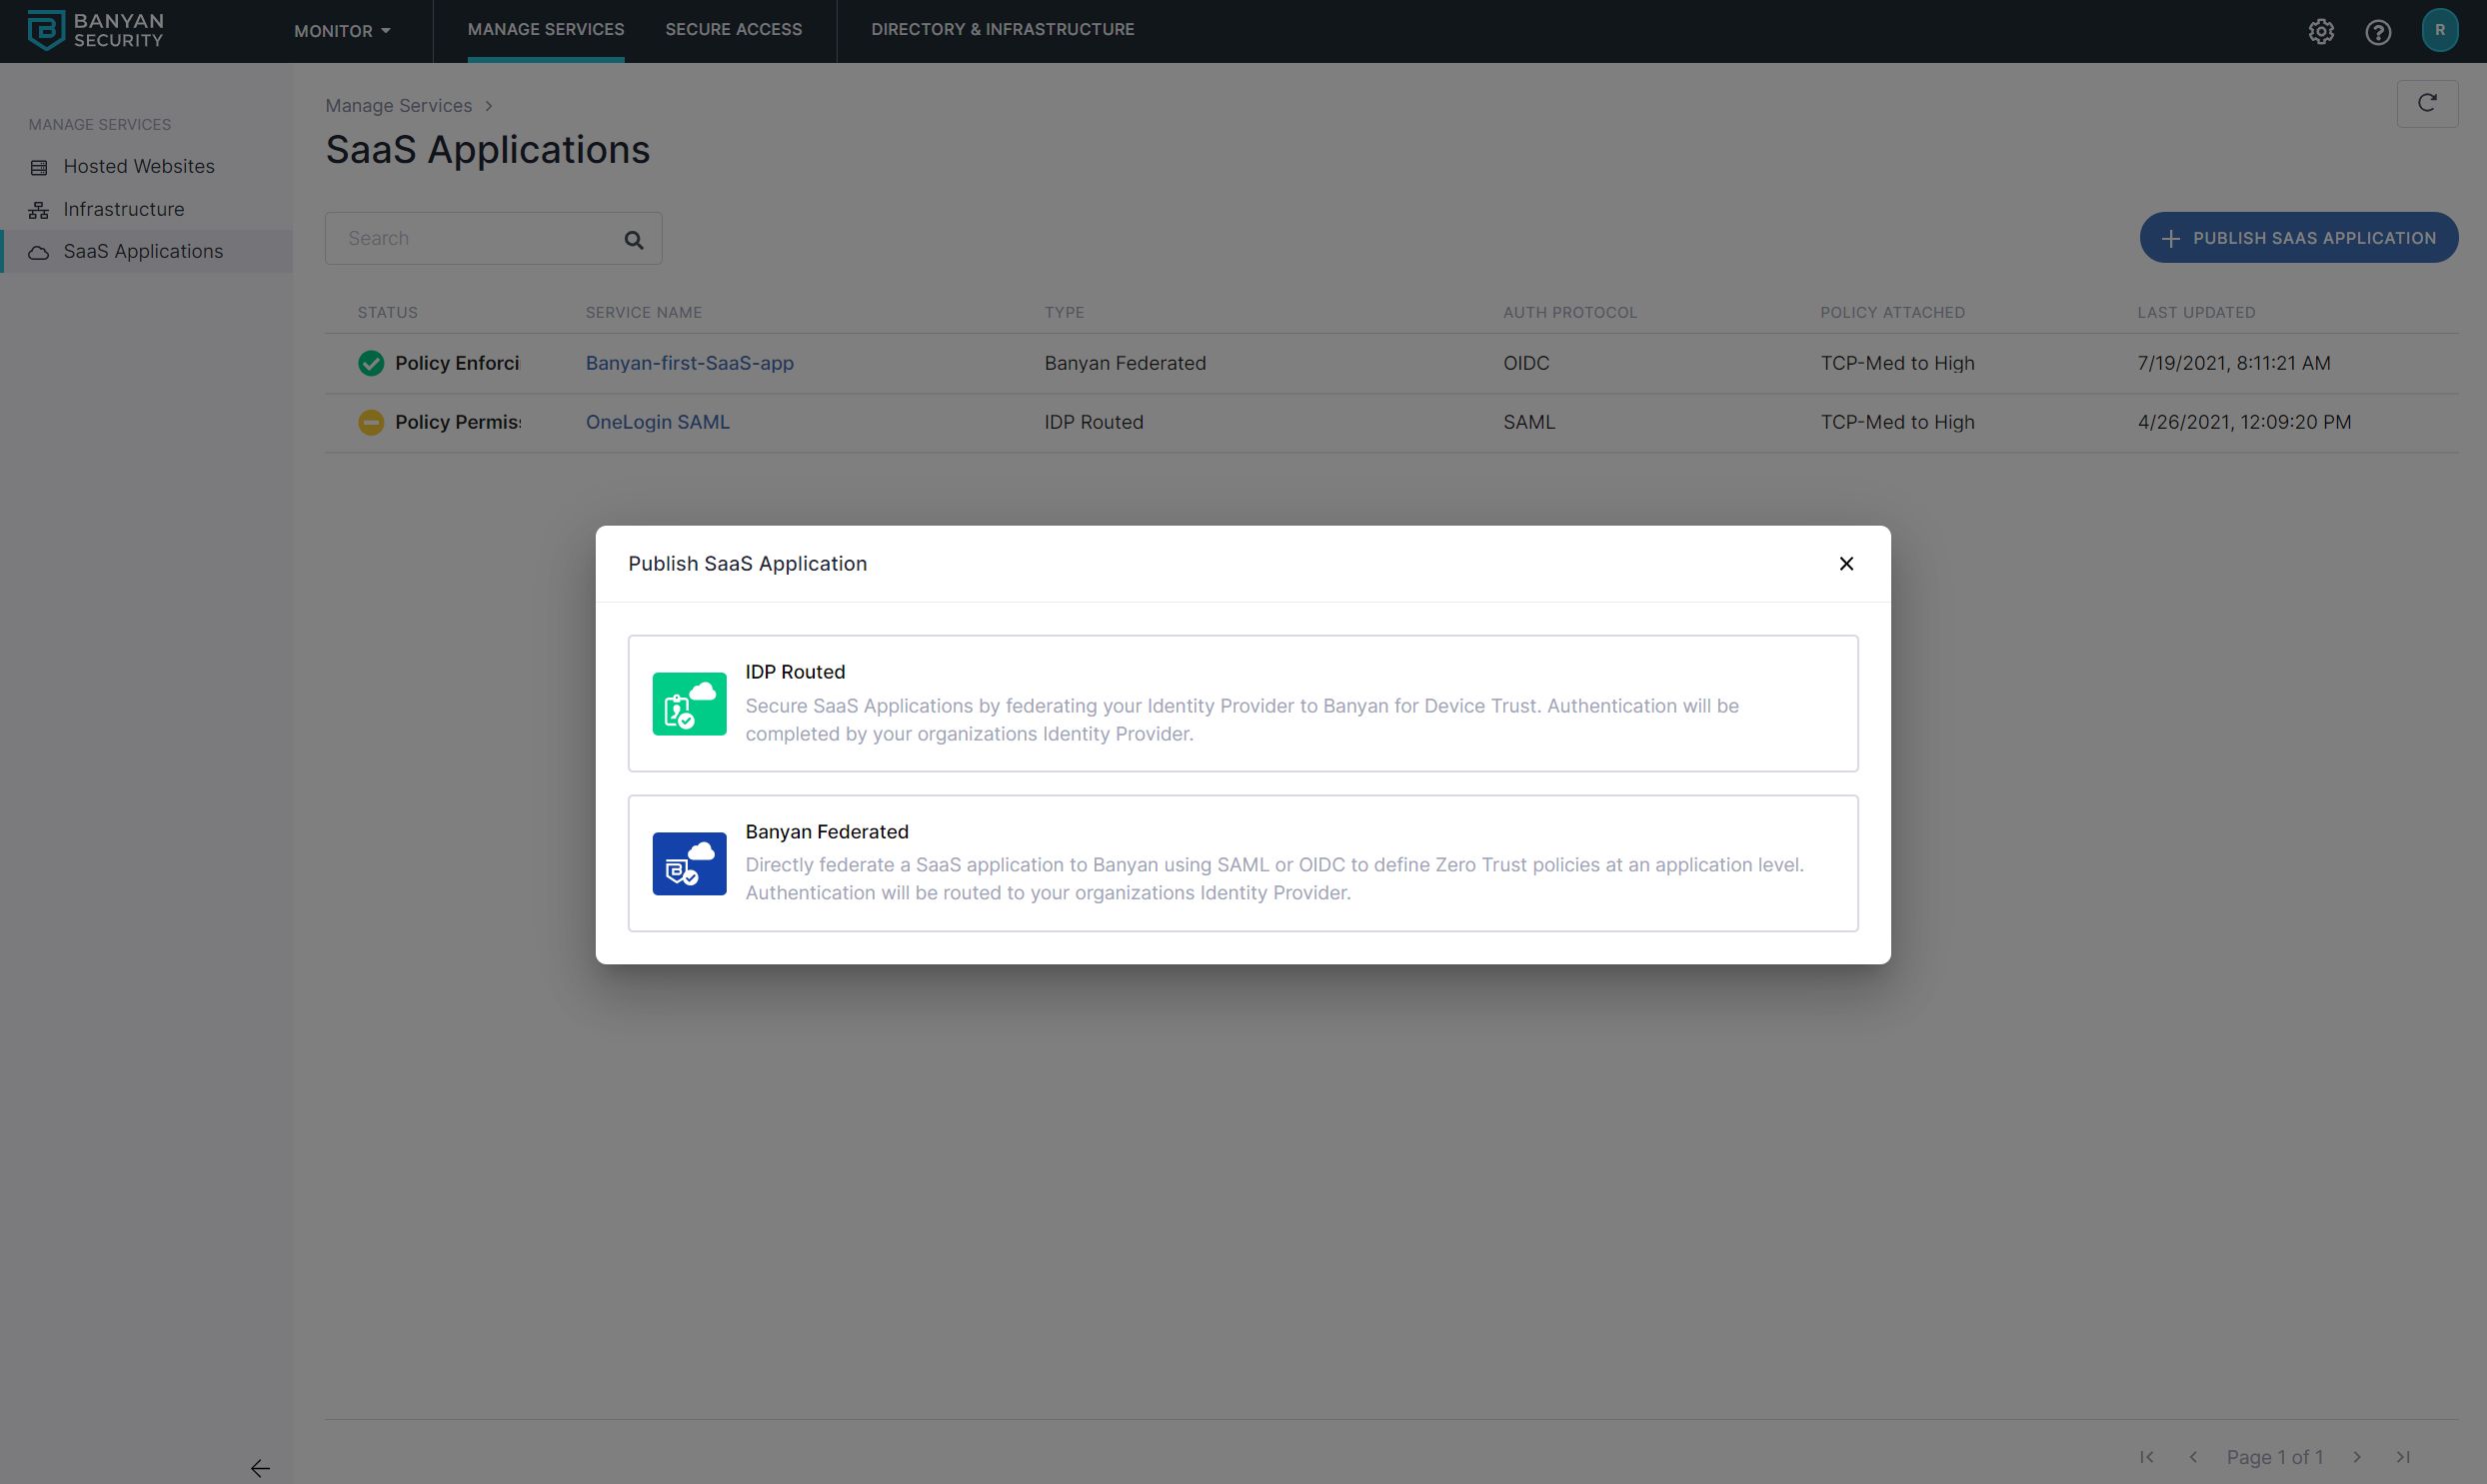
2.2 Select CSE Federated to route to CSE first. This ensures authentication traffic passes through CSE for posture and policy evaluation before reaching your Identity Provider.
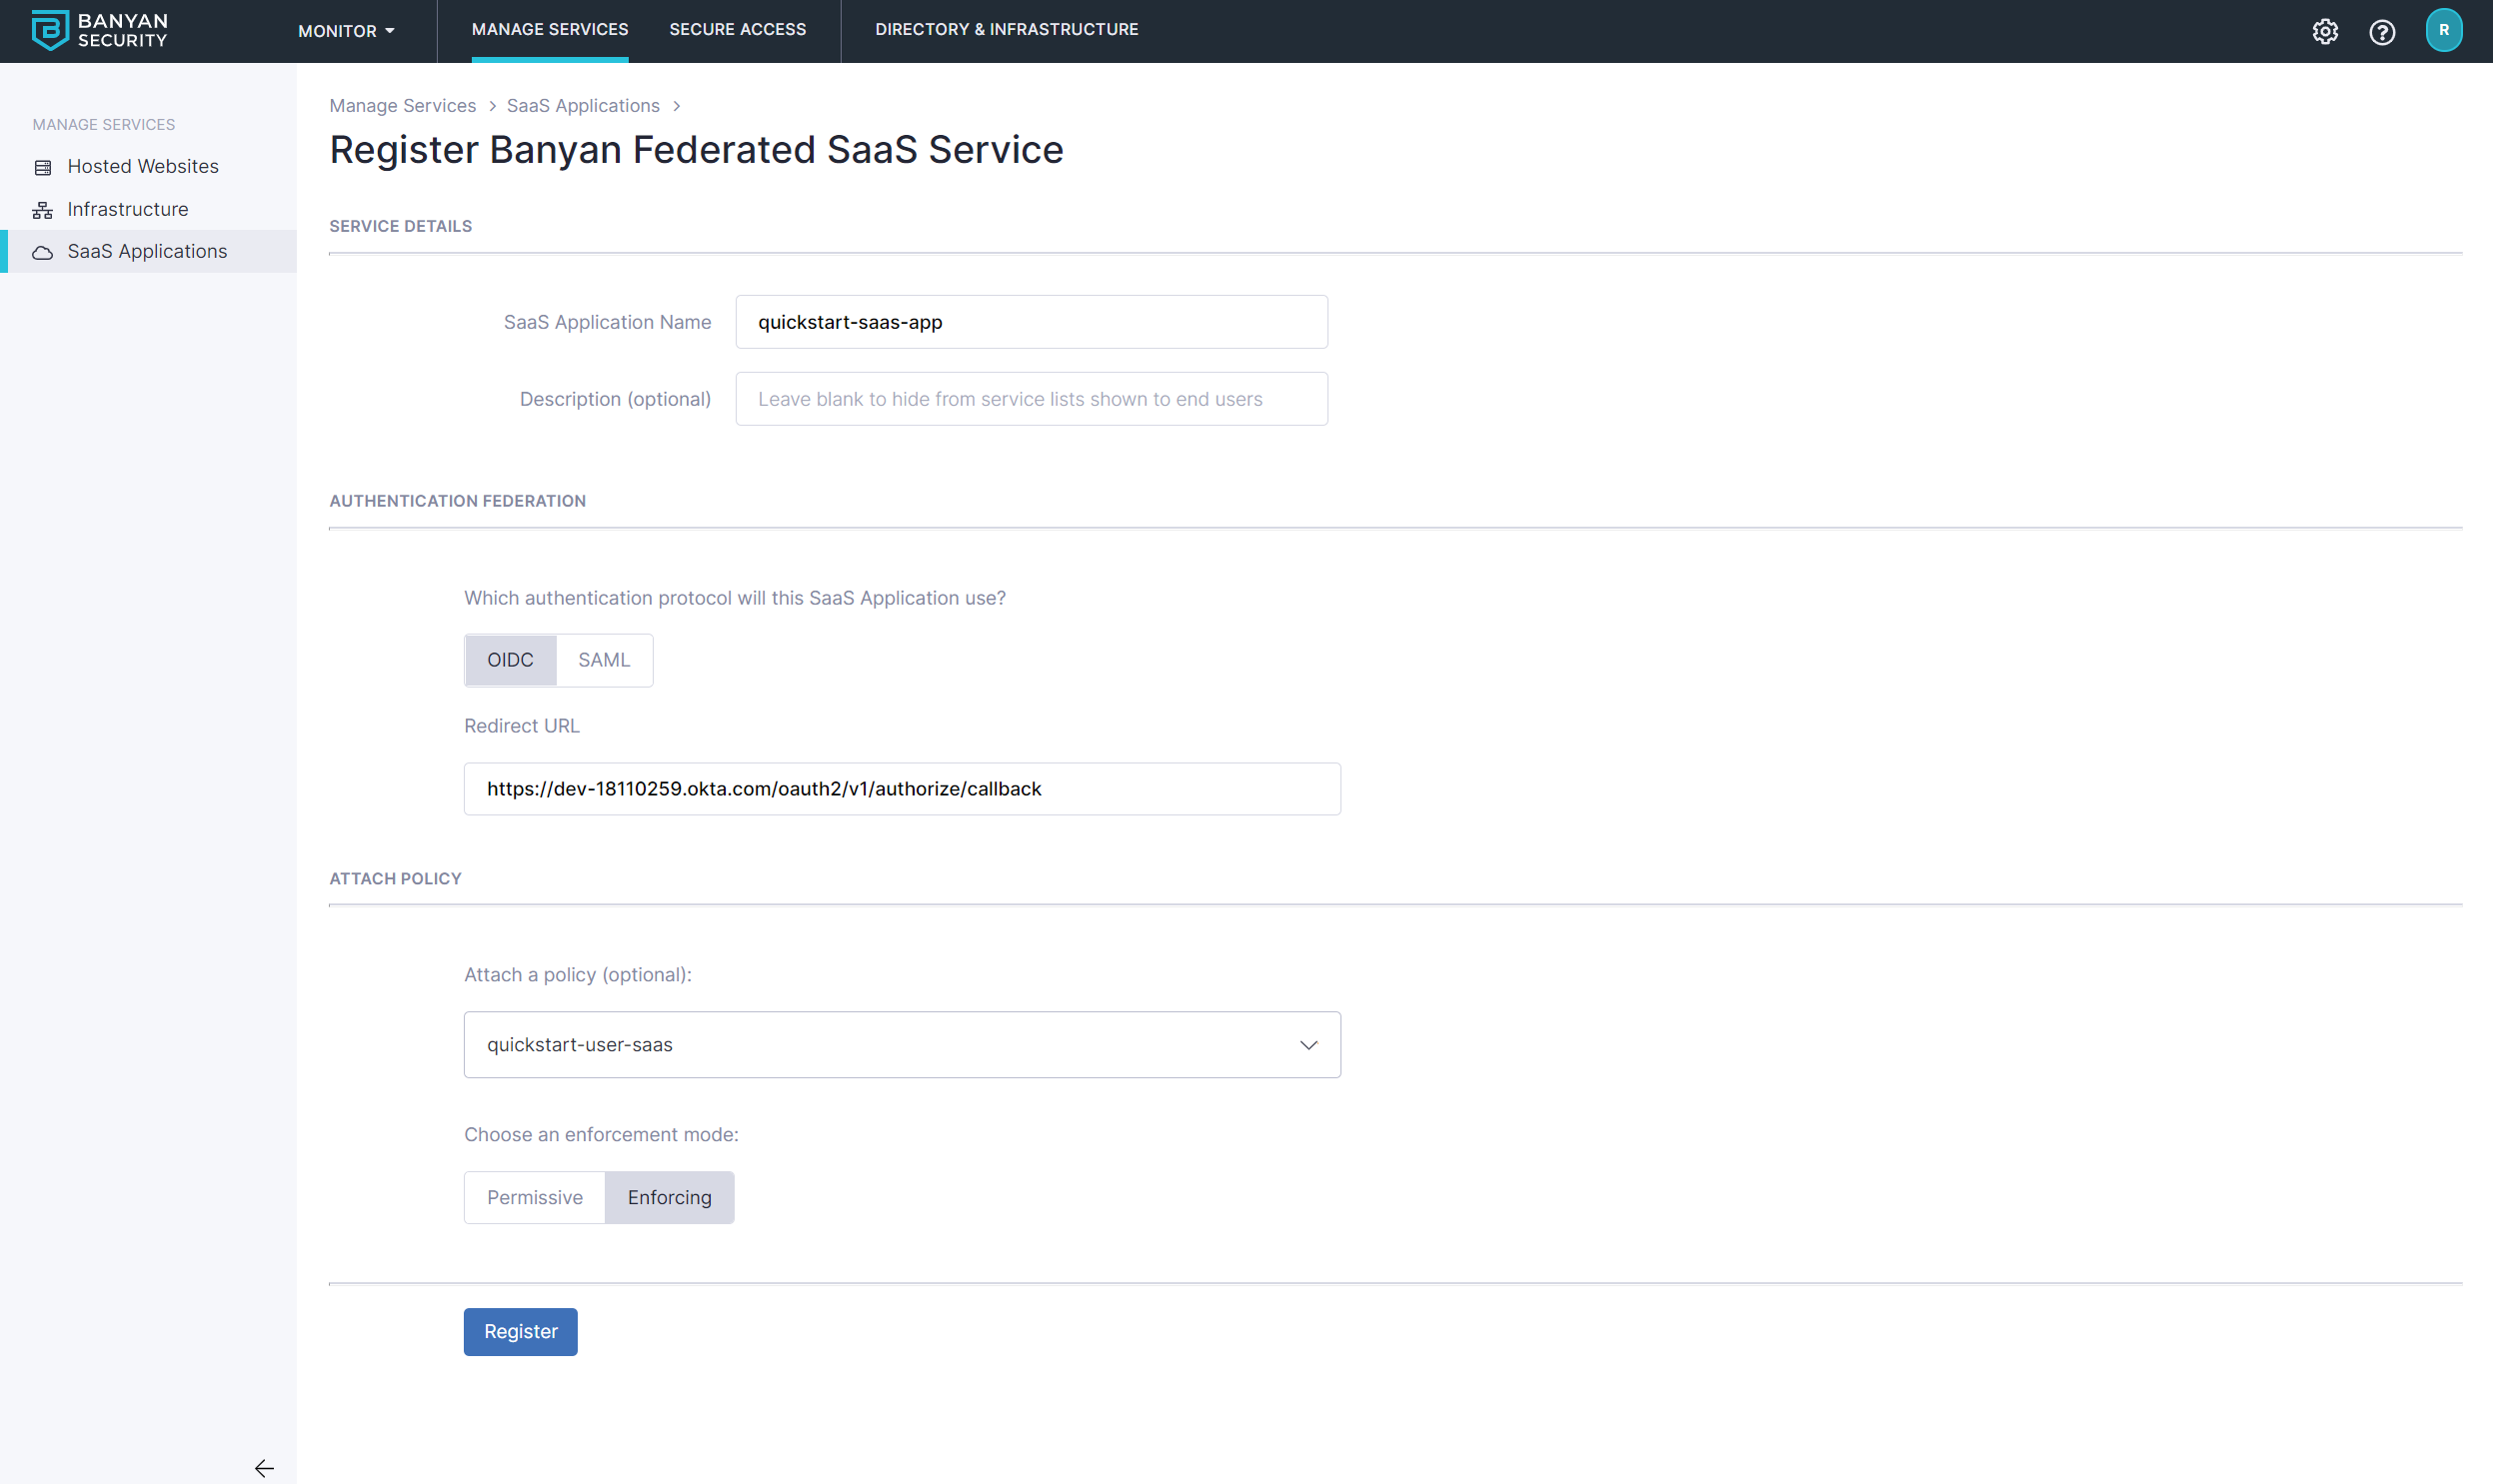
2.3 Name the SaaS App quickstart-saas-app and set the attributes:
- select the authentication protocol to be
OIDC - set the
Redirect URLto the well-known Redirect URL provided by the SaaS application you are securing
You can also configure device policies on SAML-enabled SaaS Applications.
2.4 Attach the quickstart-user-saas policy we had previously created and set enforcement mode to Enforcing.
2.5 Select Register. The next screen will give you the details you need to enter into your SaaS app; these are the CSE → SaaS App values in the “Values to exchange” table above.
Step 3. Configure your OIDC-enabled SaaS app to use CSE for authentication
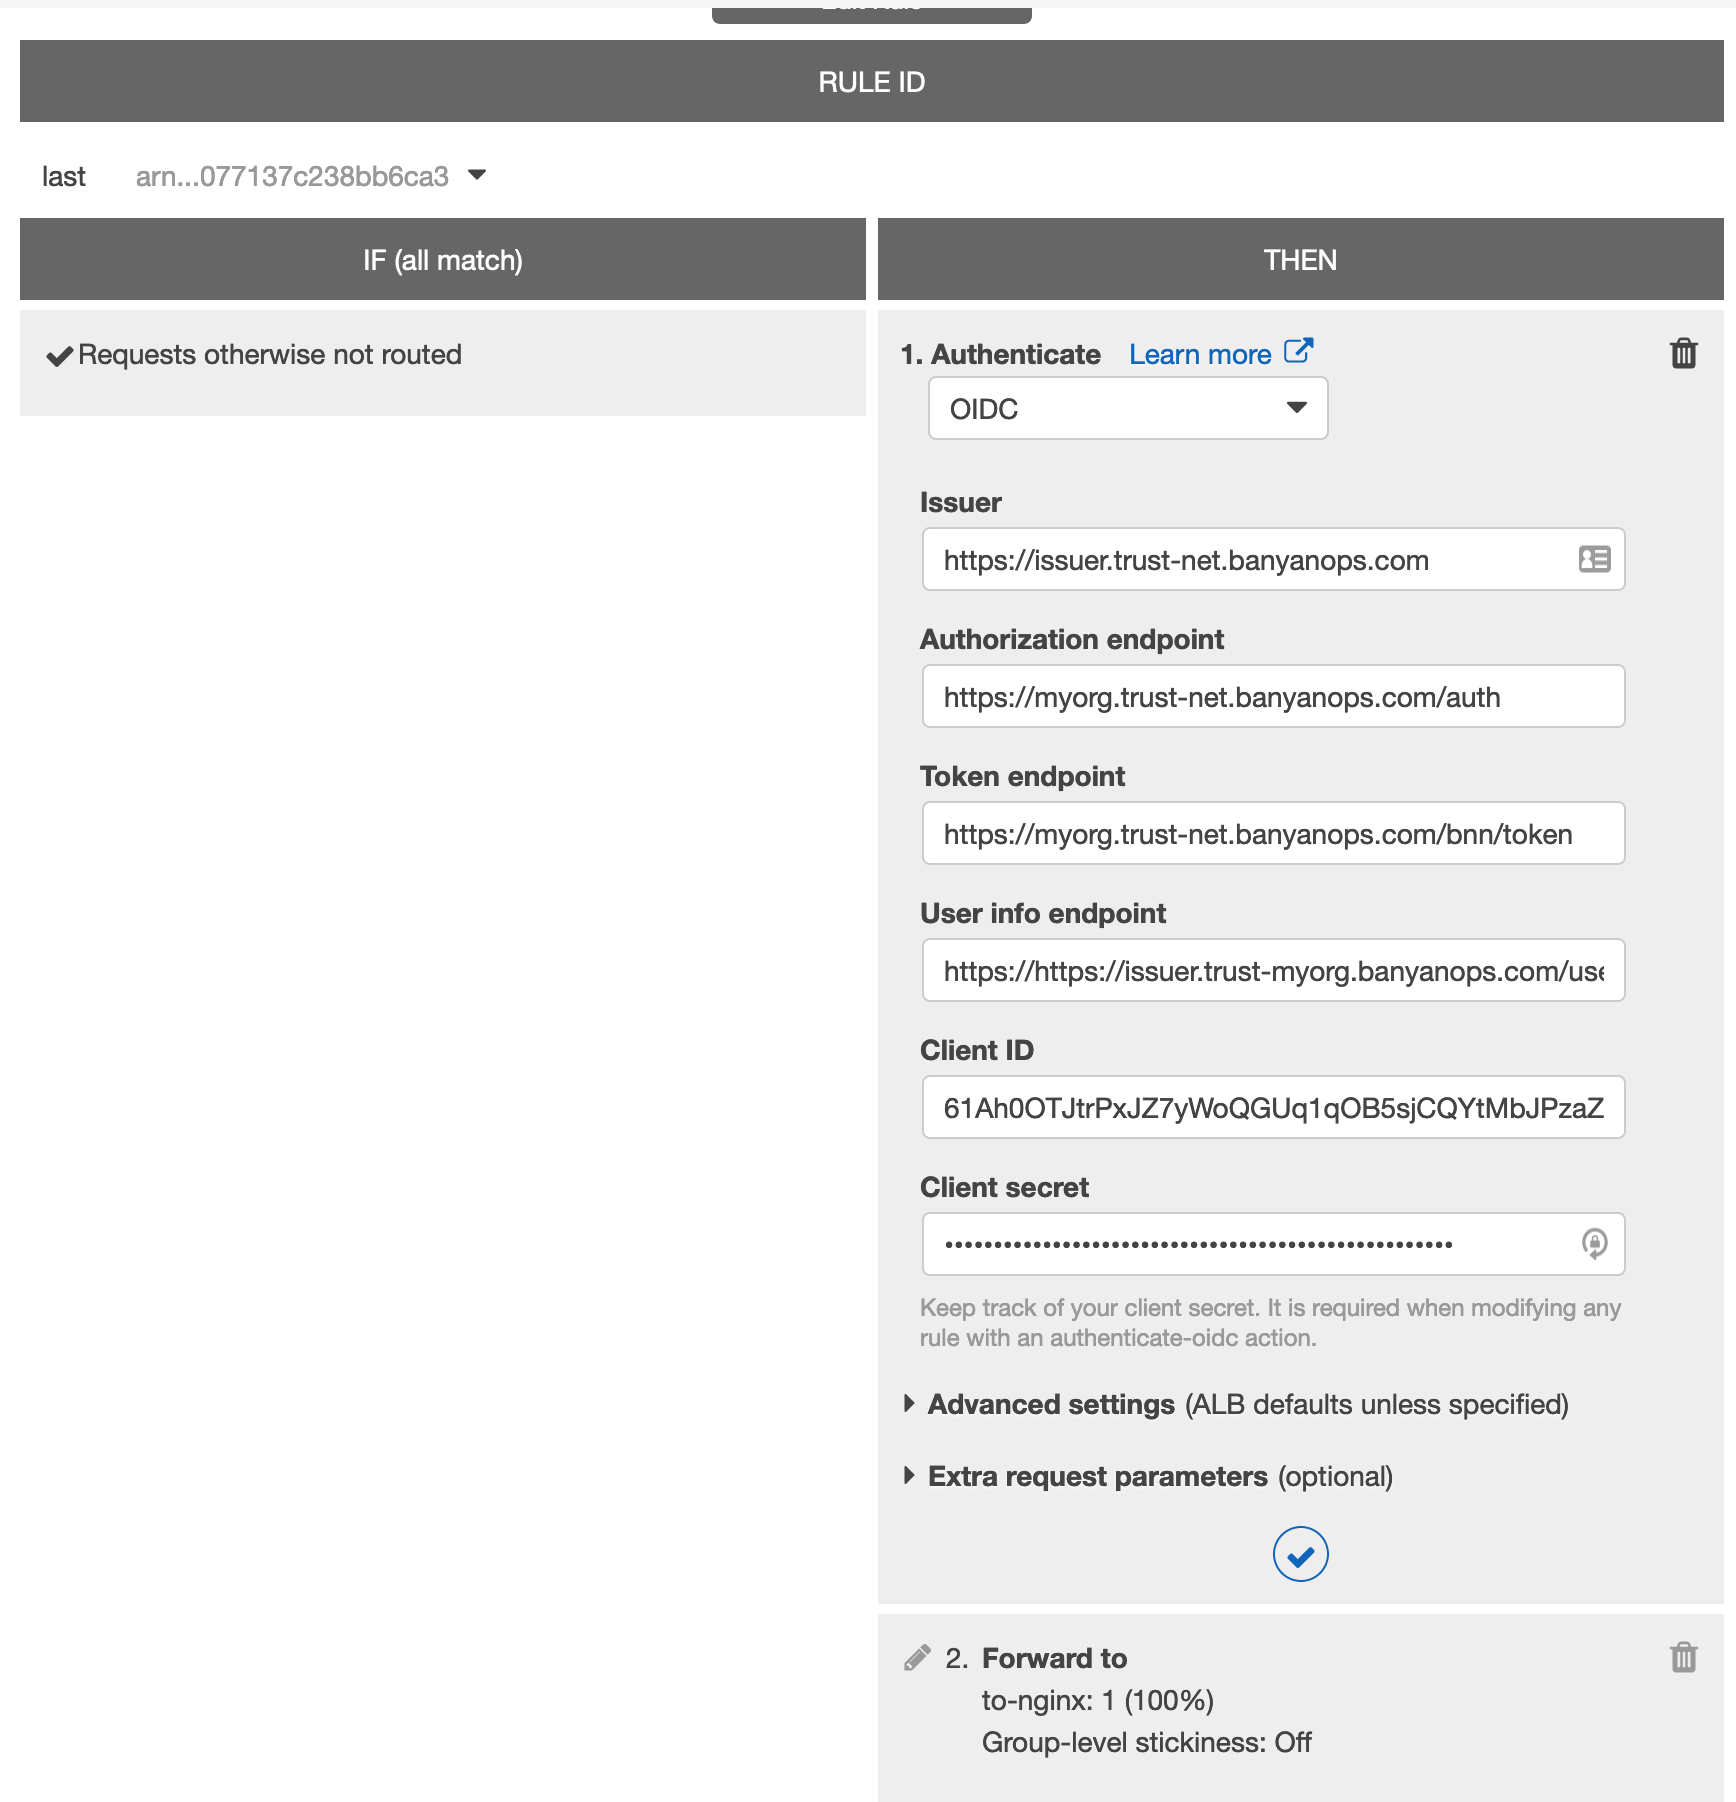
This step completes the data contract by entering the CSE-generated OIDC details into the SaaS application, so the application delegates authentication to CSE. These screens belong to the SaaS application’s vendor; consult that vendor’s documentation for the exact field names and navigation in their OIDC settings.
3.1 Fill in the data from the Command Center for the SaaS app you are securing.
Step 4. Navigate to the SaaS app and login in via OIDC
This final step verifies the federation end to end: a successful login confirms that CSE is intercepting authentication, evaluating device posture, and enforcing the policy from Step 1.
4.1 Now, you can navigate to your SaaS app and authenticate. You will be taken to your Identity Provider to login while, behind the scenes, CSE is evaluating device posture and enforcing your security policies.